How to use a Gamecube Controller with Unity
In most of my internet searching on this issue, I came across very little helpful information. This is my experience in trying to get a gamecube controller working with Unity. If you have a different experience or need help figuring something out, feel free to reach out to me at my email
Anyway, lets get on with it.
Set Up
To start, you need to have an adapter plug your gamecube controller into your computer. If you’re using some weird USB Gamecube Controller I don’t know how to help you, I’m sorry. If you have an unofficial adapter (like me), you will have to follow these instructions, if you have an official one it might work out of the box but I’m unsure. I’d recommend following that link and installing Zadig to configure your controller to begin. In addition, if your Adapter has a toggle for “PC” and “Wii U”, it must be set to “PC” in order to work with Unity, so if you are not getting any input from your controller that is a good thing to check.
Once you have installed the proper drivers and set up your controller, you’re ready to open up Unity.
Project Settings
In your Unity project, go to Project Settings, and then Input and set up any additional axes that you’d like to use. There are two types of input we’ll be setting up with our controller joystick axes and joystick buttons. For both types, Gravity, Dead, and Sensitivity do not seem to have any major effect, but let me know if you’ve found values that you think work best. You will want snap and invert off for these most likely, but frankly all of these options depend on the game you’re making.
For joystick axes, your layout will look like this:
 For Joysticks you will be changing the “Axis” Dropdown to the value I give you.
For joystick buttons, your layout will look like this:
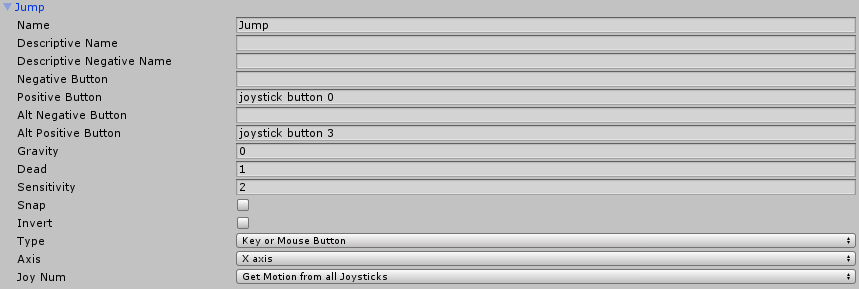 You will be updating Positive or Negative Button to be equal to “joystick button X” where X is the value given.
Now that all of our axes are set up, these are the values I was able to discover for the different Gamecube Controller axes, and what they do. If you find any I missed, as there are several buttons I was not able to figure out, please let me know.
Axis Values
X Axis (1st Axis): X Axis on the Analog Stick
Y Axis (2nd Axis): Y Axis on the Analog Stick
3rd Axis: C-Stick Vertical
4th Axis: Nothing
5th Axis: Nothing
6th Axis: C-Stick Horizontal
7th Axis: D-Pad Horizontal
8th Axis: D-Pad Vertical
These are all of the axis values I found.
Button Values
Again, this is in the format “joystick button X” for the button value.
0: X
1: L+A or R+A
2: B
3: Y
4: L
5: R
6: None
7: Z
8: None
9: None
10: None
11: None
12: D-Pad Up
13: D-Pad Right
14: D-Pad Down
15: D-Pad Left
These are all of the button values I found.
That’s All
If you have any questions or concerns, or you find any different info on how to do this. Please reach out to me at my email. Hopefully this helps.
Comments